Acrylic Pouring with Dish Soap
2 methods for fascinating cell effects without silicone oil
2 methods for fascinating cell effects without silicone oil
Here I’ll show you two easy ways to create unique cells with acrylic pouring using only dish soap; we don’t need silicone oil.

Step 1: Preparation
Before I started pouring, I prepared two canvases and diluted my acrylic paints with pouring medium. I’ll show you exactly how to do this and what you should definitely keep in mind in my pouring course.
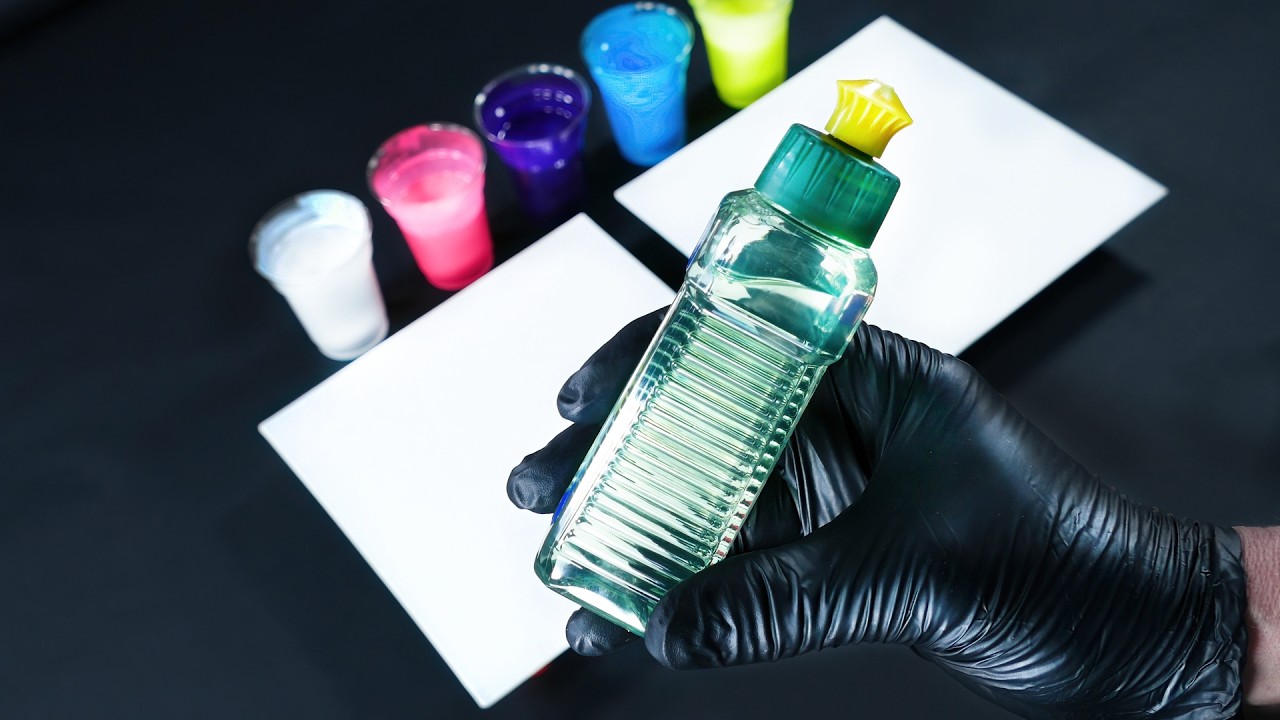
The first step is to fill two pouring cups with the following colors:

Step 2: Pouring with the Flip-Cup Technique
After filling the pouring cups with our acrylic paints, we place them upside down on the canvas.
To do this, take the canvas and place it on your pouring cup. Now hold both together and flip the canvas and pouring cup over.
The pouring cup is now upside down on the canvas.
Let the acrylic paints rest in the pouring cup for 2-3 minutes. We’ll use this time to dilute our dish soap and pour it into the spray bottle.

Step 3: We dilute our dish soap liquid
Undiluted dish soap is far too thick to work precisely. Therefore, I dilute it about 1:1 with regular tap water before pouring.
If it’s too diluted, it loses its effect on the acrylic paints.
Therefore, use the same amount of dish soap and water; then it sprays perfectly, creating the cell effect in Image 1.
You can use different spray bottles, such as an empty glass cleaner bottle, a plant sprayer*, or, as in my case, a spray bottle*.
The spray bottle has the advantage of spraying very fine droplets onto the painting. However, the foam in the dish soap also causes larger volumes of liquid to be sprayed onto the painting. This creates a more uneven cell pattern that looks much more natural.


There’s no such thing as the “right” dish soap for acrylic pouring; you can use any common brand. I’ve tried several brands, whether Pril, Frosch, or, in this case, Fit, and I haven’t noticed any significant differences.
Just use whatever dish soap you already have at home.
Step 4: I paint the picture using the flip-cup technique
We’ve now diluted our dish soap, and the acrylic paints have had a few minutes to settle at the bottom of the pouring cup.
The pouring cups are now lifted so that the acrylic paint runs in a puddle onto the canvas.
We then spread the paint by swirling the canvas so that the entire canvas is covered.
This creates beautiful areas of color with wonderful color gradients.


The finished result using the flip cup technique: if you don’t like cells, you can enjoy such beautiful pictures.
Method number 1: We spray the dish soap-cell mixture directly onto our acrylic paints.
I find this method the best because it’s really easy to use and you can even control the area where the cells should appear.
All you have to do is spray the dish soap flecks onto the paint with a spray bottle or atomizer; the dish soap does the rest for you.
Using the flip-cup pouring technique, we have multiple layers of paint on the canvas, with the paint mixed together.
When the dish soap hits the paint, it displaces the upper layers of paint, and we see the layers underneath, which is what we perceive as cells.


Method number 2: We let the dish soap liquid drip into the acrylic paints
With this variation, we create very specific cells by placing them where we want them. We also determine the number of cells and, to some extent, their size.
To do this, we take our dish soap and a pointed object such as a toothpick or barbecue skewer.
The point allows us to selectively drop just one drop onto the acrylic paint.
The dish soap drop should be placed at a certain distance from the paint so that it can penetrate deeper into the paint layers, thus not only spreading the surface but also incorporating the colors of the lower layers.
After the drop falls into the paint, it takes some time for the effect to take hold. This method creates cells that look like fractal patterns, similar to snowflakes in close-up.
Tip: Instead of the wooden sticks, simply use a pipette* to drip the dish soap into the paint!

I didn’t like the result of the first version, so I mixed a little white paint into the dish soap to create some more white accents and cells.
You can also drop pure white paint into the center of the cells to enhance the effect even more.

Here we see a detailed view of the fractal cells.

The final result: I find the cells very interesting, but I like the first result with the spray bottle better.

When you use silicone oil to create cells, the oil is mixed into the paints, creating a large number of vibrant cells. (I’ll show you this in different variations in the course.)
This is due to the driving force of the silicone oil; it’s so strong that the binder and pouring medium that hold the pigments together in the paints can no longer maintain the tension.
Silicone oil pushes the paints apart in a circular pattern, exposing the underlying layers of paint.
Dish soap can’t do this; in my experiments, there were only a few cells, so it was more of a coincidence. Therefore, I can’t recommend it; it would just be a waste of acrylic paint.
The video on acrylic pouring with dish soap – have fun trying it out!
By loading the video, you accept YouTube's privacy policy.
Read more
You might also be interested in:
Discover 33 extraordinary acrylic pouring techniques as inspiration for exciting picture compositions.
Anyone can paint with liquid acrylic paints! I’ll show you the easiest way, guaranteed to work.
12 simple acrylic pouring techniques that anyone can copy right away.